Why do I need grout?
Grout keeps ceramic tiles in place; it also keeps liquids, such as bath water that spills over the side of the tub, from penetrating the spaces around those tiles. It does the same for your bathtub, where it abuts the floor and walls, and sink (a.k.a. ‘caulk’). There are other applications for grout, but these are the ones you will be most familiar with in your home.
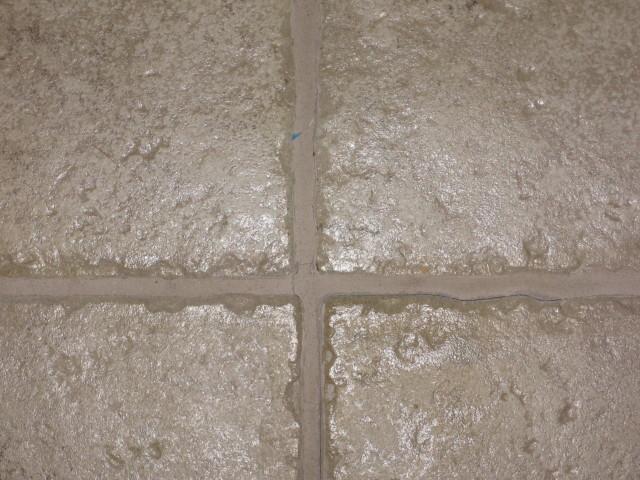
The grout around your tiles, and possibly around your tub and sink, is a mortar-like compound of water, sand, and cement. It dries quickly and becomes rock-hard. It usually comes in white, but it can be stained in almost any color.
The other stuff that looks like grout and can even go over the grout to seal out moisture is called caulk, or caulking compound. You can tell the difference between this and grout because it has the consistency of toothpaste when you apply it, and it never dries quite as hard as grout. It comes in either small tubes or in the form of long cartridge inserts that load into metal caulking guns.
In at least two ways it is similar to grout: black mold and mildew will grow on it, and you attack both of these problems the same way. These things aren’t just unsightly, they’re also a health risk. Best clean it off. There are several ways to do this:
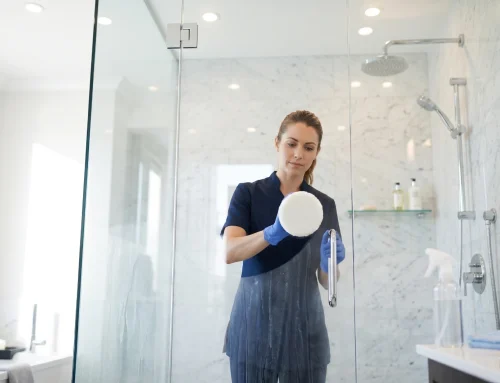
How to clean grout?
An Easy, Home-Made Grout Cleaner – The natural method also happens to be the cheapest. The last time we checked, a bottle of hydrogen peroxide cost about 88 cents. That and a spray bottle are all you need. Use half a cup of the stuff mixed with one cup of water. Put it in a spray bottle and spray it on the moldy areas. Don’t rinse. Some recommend a bleach solution rather than using hydrogen peroxide, but bleach is a major pollutant and it can turn your grout yellow so you might want to try the peroxide first. Spraying the grout with peroxide on a regular basis will also inhibit the mold from forming so consider keeping the bottle in your shower and spraying everything down periodically. Vinegar seems to have the same effect.
Clean Tile Grout with a Toothbrush – Unless dealt with regularly, mold can build up to the point where it needs to be attacked with a toothbrush and cleaning solution. Toothbrushes will not mar tile surfaces. If you’ve got a lot of work ahead of you, a high-speed electric toothbrush will make the work much easier.
Beware Harsh Chemicals – A number of environmentally-unfriendly commercial cleaners are touted to do the job, including Commercial Zep Mildew Stain Remover, X-14, and Limeaway. Never use these or other chemicals in combination, however, as poisonous gasses can result.
Pure Hearsay – Perhaps the ultimate herbal approach to killing mold and mildew on grout is a solution of tea oil and an antifungal; mixed with 2 tablespoons per 2 cups of water. Does it work? Try it and let us know using the form at the bottom of the page.
Stain it Some More – An alternative approach is to cover the mold with a grout stain. This can be found at almost any home improvement store and will not fix your problem, only cover it up.
How to Prevent Grimy Grout?
You will be cleaning mold and mildew less if your bathroom, kitchen, and anyplace else where tile combines with moisture, is equipped with an exhaust fan that takes the moisture out of the air.
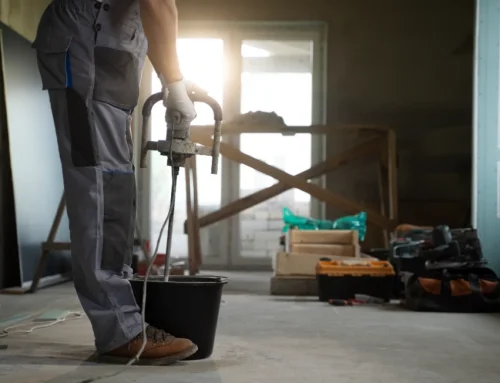
How to Remove Grout?
While you’re cleaning tile grout, take a careful look to assess how the stuff is holding up. If you see a lot of cracks and missing pieces, it may be time to replace it. Better to do it now before liquids seep through and start rotting out whatever is underneath the tile. Repairing is actually pretty easy. You only need a few inexpensive tools to remove the old stuff yourself. Grout remover kits can be found online and at most hardware stores.
Once you have gotten out all the loose old stuff, you can begin replacing the grout, tamping it in with your finger. If you have to cover large areas, it’s recommended to first mix the grout with latex additive to make it more waterproof.
Let the grout set for about three minutes, then go over it with a rubber float to force the grout deep into the joints. Follow up by wiping with a clean, damp sponge. The final touch is to add silicone caulk to the horizontal line between the top of the tub and the first layer of tiles. Silicone is preferable to latex because it grips better and doesn’t come off as easily as latex caulking.
Finally, once the grout has been applied and allowed to cure, it should be sealed. Grout sealants prevent mold and dirt from penetrating into the grout or calking and make cleaning much easier.
When Grout Mildew Just Won’t Quit
If, after cleaning, the mold returns quickly, you may have more than just a surface mold problem. The mold may be embedded behind the tile and grout. You need to take a look, either by removing some tiles or cutting through an adjoining wall. Extensive mold is going to require some extensive work, so best call in a mold removal expert.
The same caution applies to caulk. If mold is building up with some frequency, inspect it for breaks – the mold could be coming from underneath, and the caulking should be removed.
There is another problem related to cleaning grout, particularly appropriate to those people who have children or have visiting friends or relatives who aren’t too bright. This is the problem of color stains on grout – such things as ink, crayons, hair dye, blood, etc. To clean crayons from grout, you can try using lighter fluid, turpentine, or mineral spirits, being careful not to inspect your work closely by the light of a lit match afterward. However, it would be safer, and probably more effective, just to chip out the damaged sections of grout and replace it with new – or use a grout stain to hide it.
Are you looking for floor cleaning services? Hiring Interworld’s commercial cleaning services is the best choice.
Call us now!